top of page

LED Measuring Cup
Project Length
5 weeks
Design and Project Intent
A LED measuring cup that enhances precision in cooking.
.png)


problem statement : common measuring cups

"I encounter difficulties reading the measurements on the side of the cup, as the lettering is too small."

"I experience back strain from frequently bending down to accurately read the water level on the side of the cup."

"I find it challenging to securely grasp the cup's handle because the handle due to its lack of defined edges."
anatomy of a liquid measuring cup

LIP
HANDLE
MEASUREMENTS
BRAND IDENTITY
GLASS SIDES
task analysis : a step-by-step study

pain points to solutions : existing product - new design

Can't read measurement due to difficulty reading small text or back pain.
Blue LED Light causes attention and allows user to focus on light for measurement.
design goals
INCREASE PRECISION
Insuring that the cup's measurement is correct and accurate.
LED SENSING
Achieving an integrated LED system to read measurements based off of water level sensor.
ERGONOMICS
Improving form and functionality with integrated electric components.


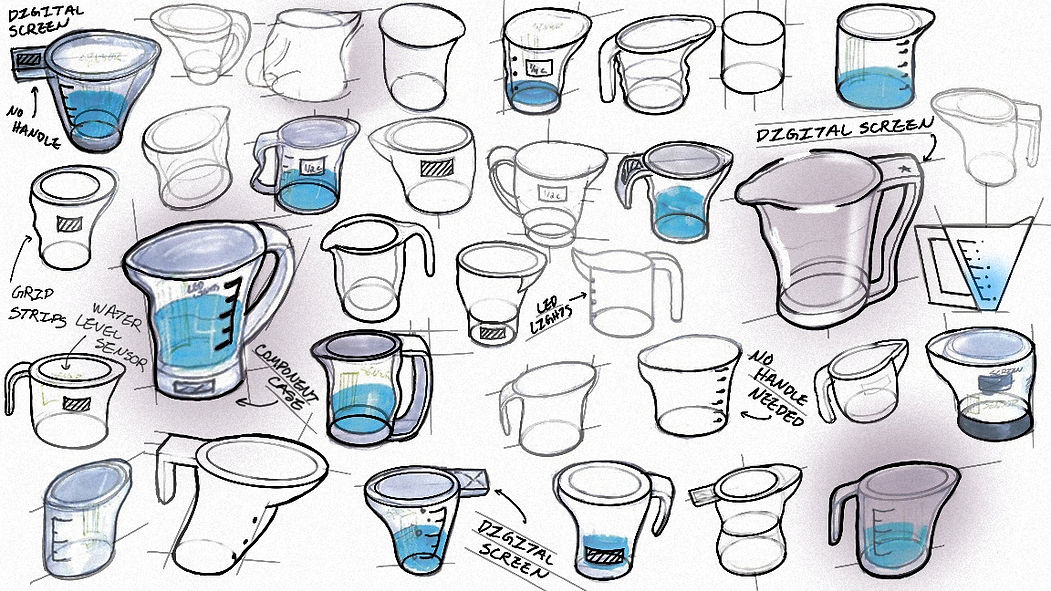
sketches : ideation level sketching

sketches : second level sketching


sensor analysis

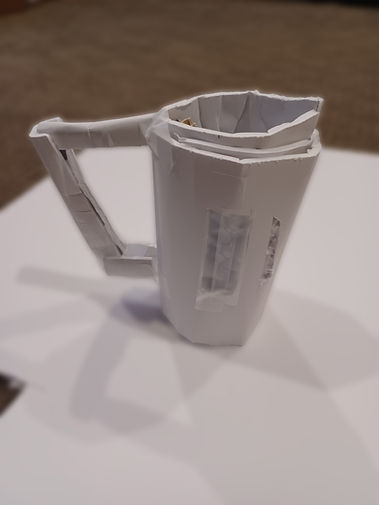
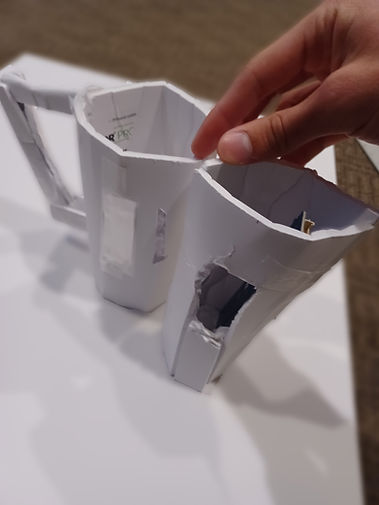
foam board prototype

Handle should be attached to the cup.


"Using two cups to house the components is an excellent idea!"
cad model : each measurement on the cup is correlated to the taper angle to perform the correct size of liquid.


1/1
3D printed forms


final model

A clear window designed to see water pour into the cup.

The blue LED light simplifies water.

water level sensor

The numbers on the side represent how many cups of water are in the cup.
exploded view with materiality

Components
1. Grove Water Level Sensor
2. LED Light Strip
3. Nano Arduino Board
4. Mini Breadboard
5. Wires (7)
6. Glass
7. Black Plastic
final render

Future Adjustments
I would create a alternate
design in the future by exploring alternatives to this design. For instance, I would utilize a pressure plate sensor that calculates the measurement and is shown through LED's as seen here.
bottom of page